Quick Start Guide
Taking an Order & Capturing a Signature
Everything you need to start a call, place an order, capture a customer signature, and upload it to the server.
In this guide
| 1 Starting the Call | 2 Placing an Order |
| 3 Capturing a Signature | 4 Completing & Uploading |
?
Part 1
Starting the Call
1
Find your customer
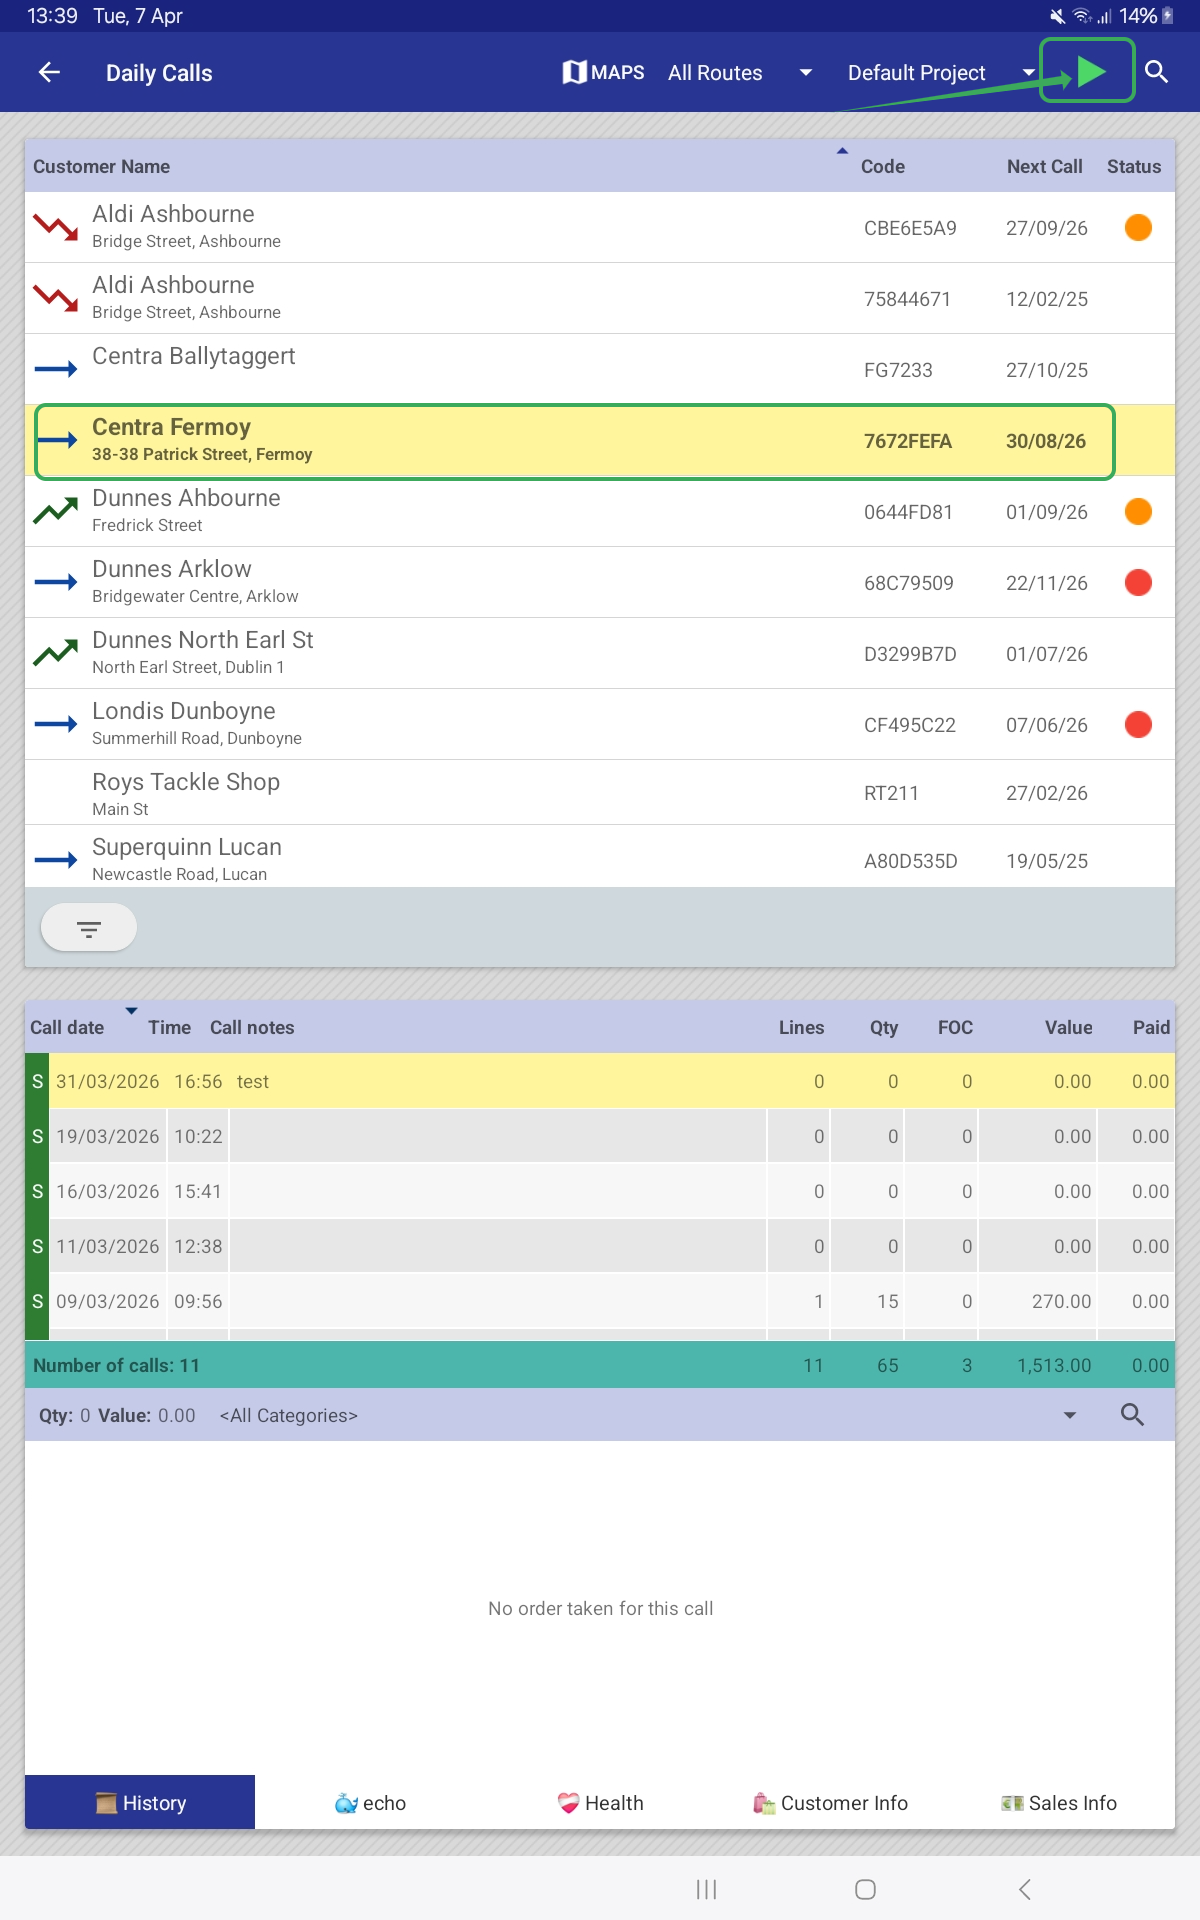
Your daily call list appears on the Daily Calls screen. Scroll or use the search icon to locate the customer you are visiting.
2
Review customer info
Tap the customer row to view their call history, order summary, and account details. In landscape orientation the screen displays a split-view with the customer list on the left and history on the right. In portrait orientation the panels are stacked vertically.
3
Tap Start
Tap the START button in the top-right corner of the screen. The app is now in an active call for this customer.
ℹ️ The blue left-edge highlight and the START button indicate the currently active customer. Only one call can be active at a time.
?
Part 2
Placing an Order
1
Go to the Orders screen
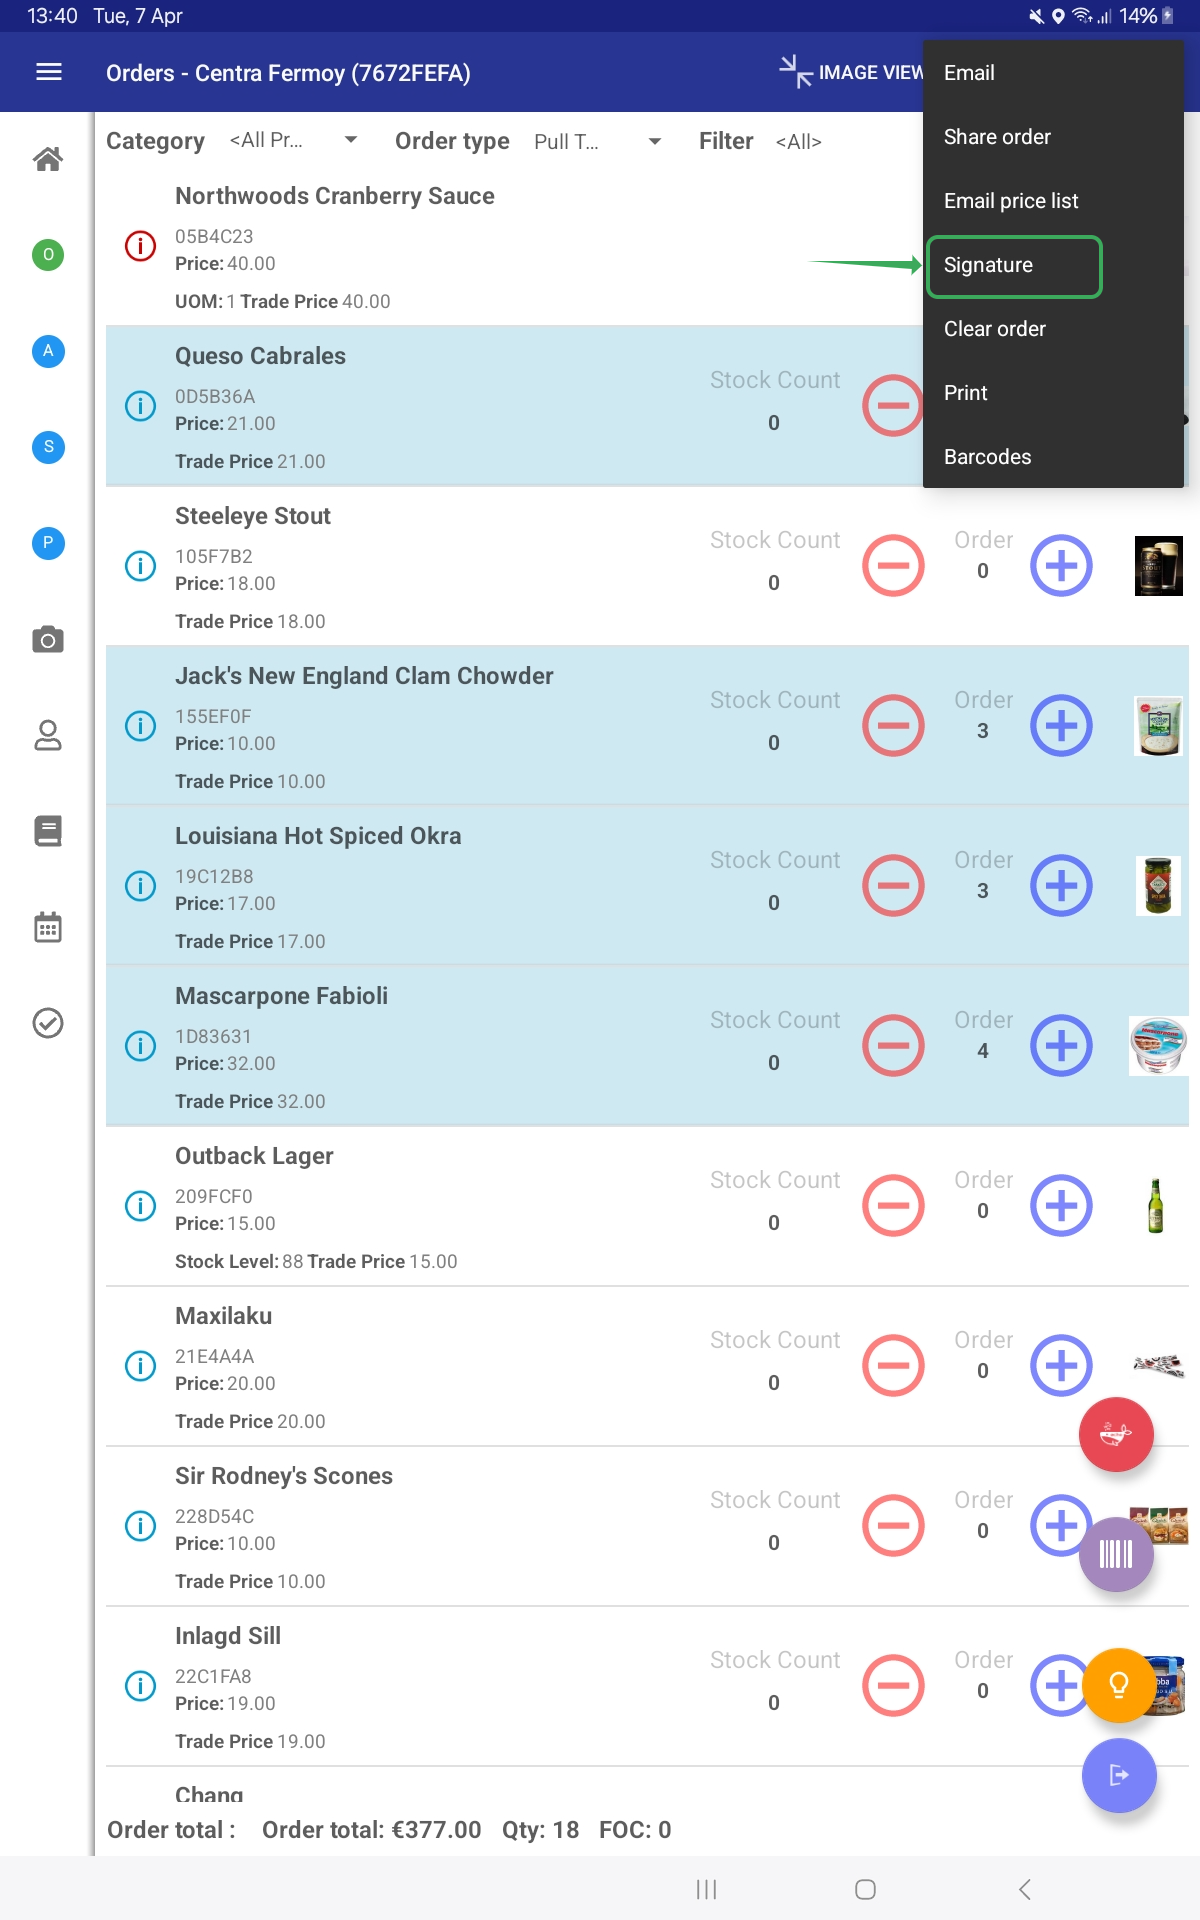
Tap the O icon in the left-hand navigation to open the Orders screen. The full product catalogue for this customer is displayed.
2
Add products
Tap + next to any product to add it to the order. Use – to reduce the quantity.
3
Filter the catalogue
Use the Category, Order type, Filter, and Sort dropdowns at the top of the screen to narrow the product list.
4
Review the order total
The running order total is displayed at the bottom of the screen, showing order value, quantity, and FOC count.
? Use the IMAGE VIEW toggle in the top toolbar to switch between list and image views of the product catalogue.
✍️
Part 3
Capturing a Signature
1
Open the overflow menu
While on the Orders screen, tap the overflow menu (⋮) in the top-right corner.
2
Select Signature
Tap Signature from the dropdown menu.
3
Enter the signee's name
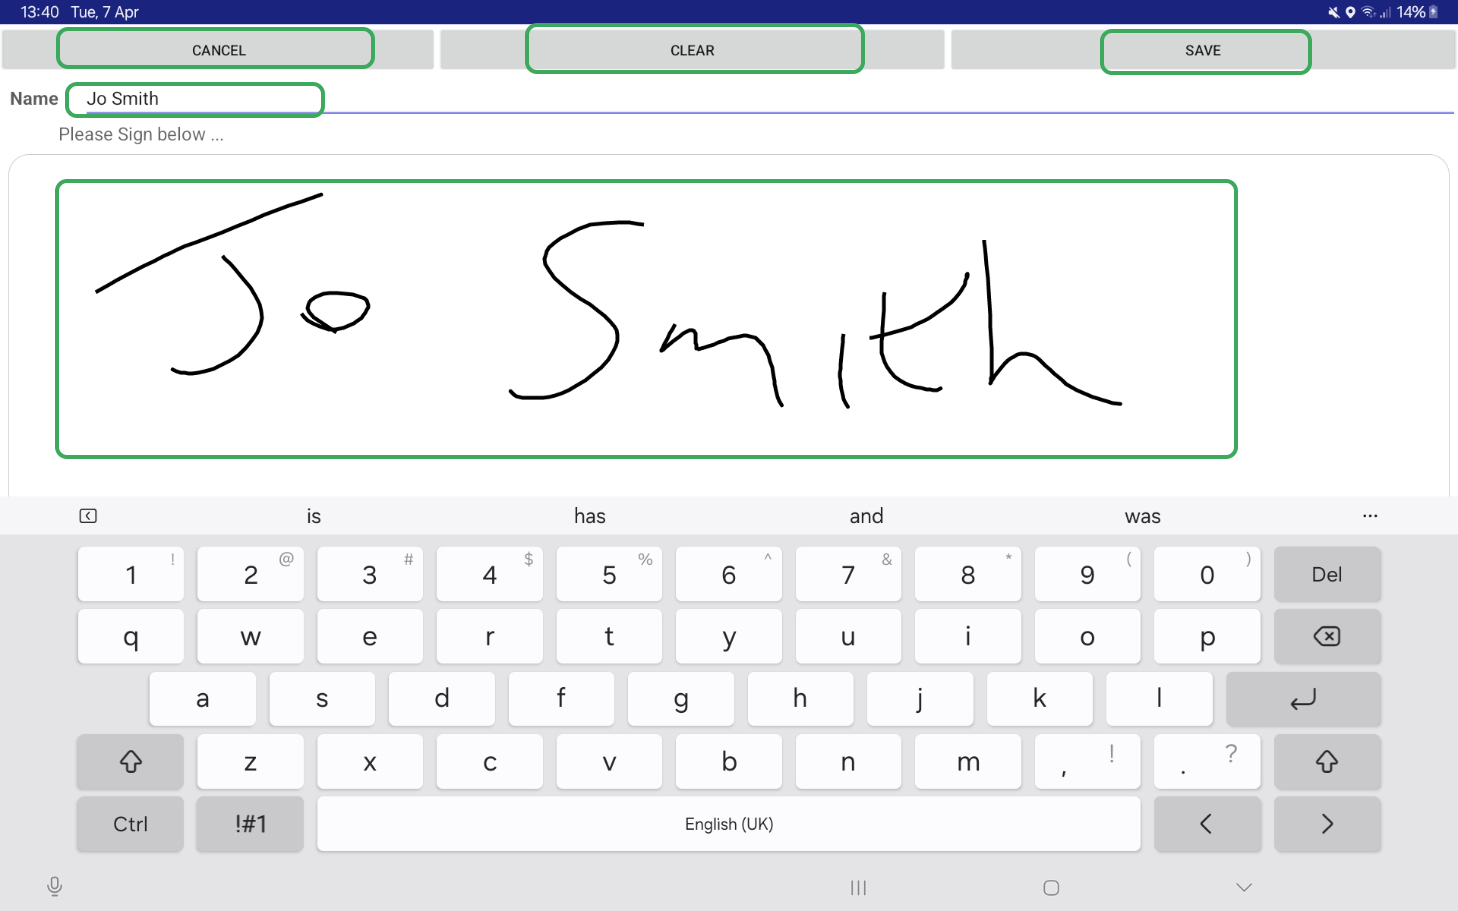
Type the customer's name in the Name field at the top of the signature screen.
4
Capture the signature
Ask the customer to sign in the designated area using their finger or a stylus.
5
Save or redo
Tap SAVE to store the signature. If it needs to be redone, tap CLEAR to reset the field. Tap CANCEL to discard and return to the order.
ℹ️ A signature can be captured during both order and delivery workflows using the same steps above.
✅
Part 4
Completing & Uploading the Call
1
Open the completion dialog
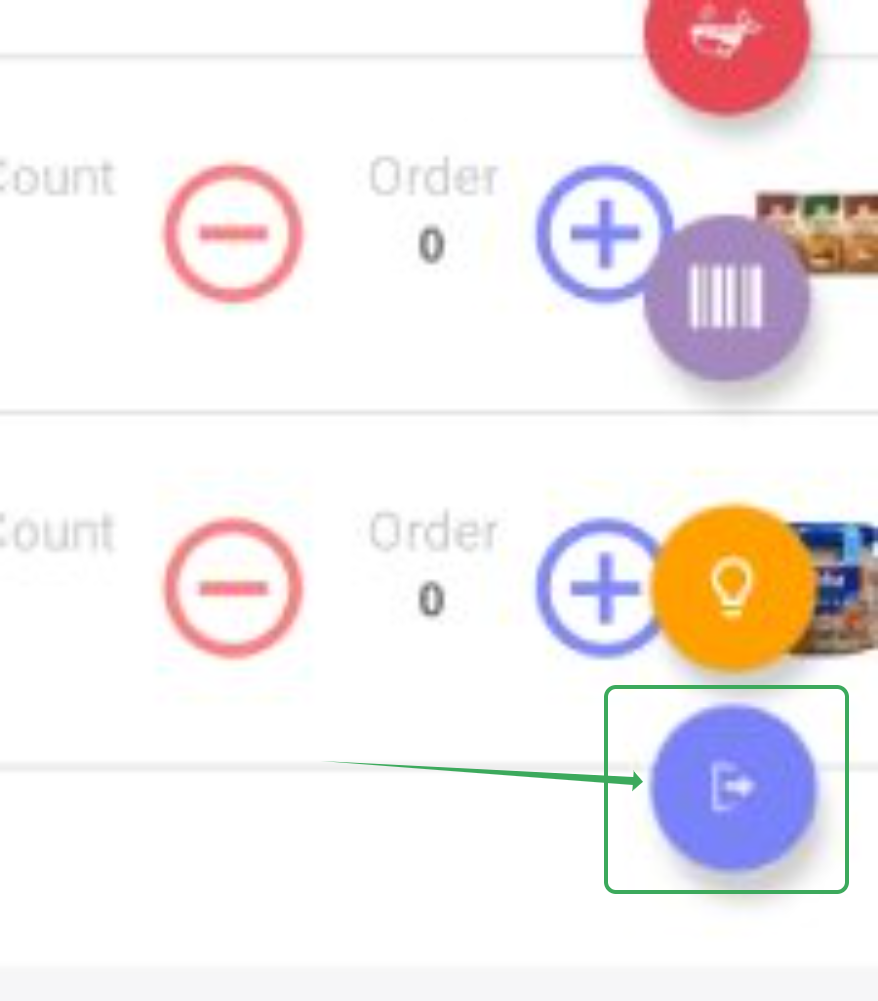
Tap the Complete Call icon. A completion dialog will appear.
2
Hold call on device (optional)
If you are not ready to finalise the call, select Yes next to Hold call on device. This prevents the call from syncing and allows you to return later to finish the order, audit, survey, or promotion. When ready, reopen the call, set this to No, and complete as normal.
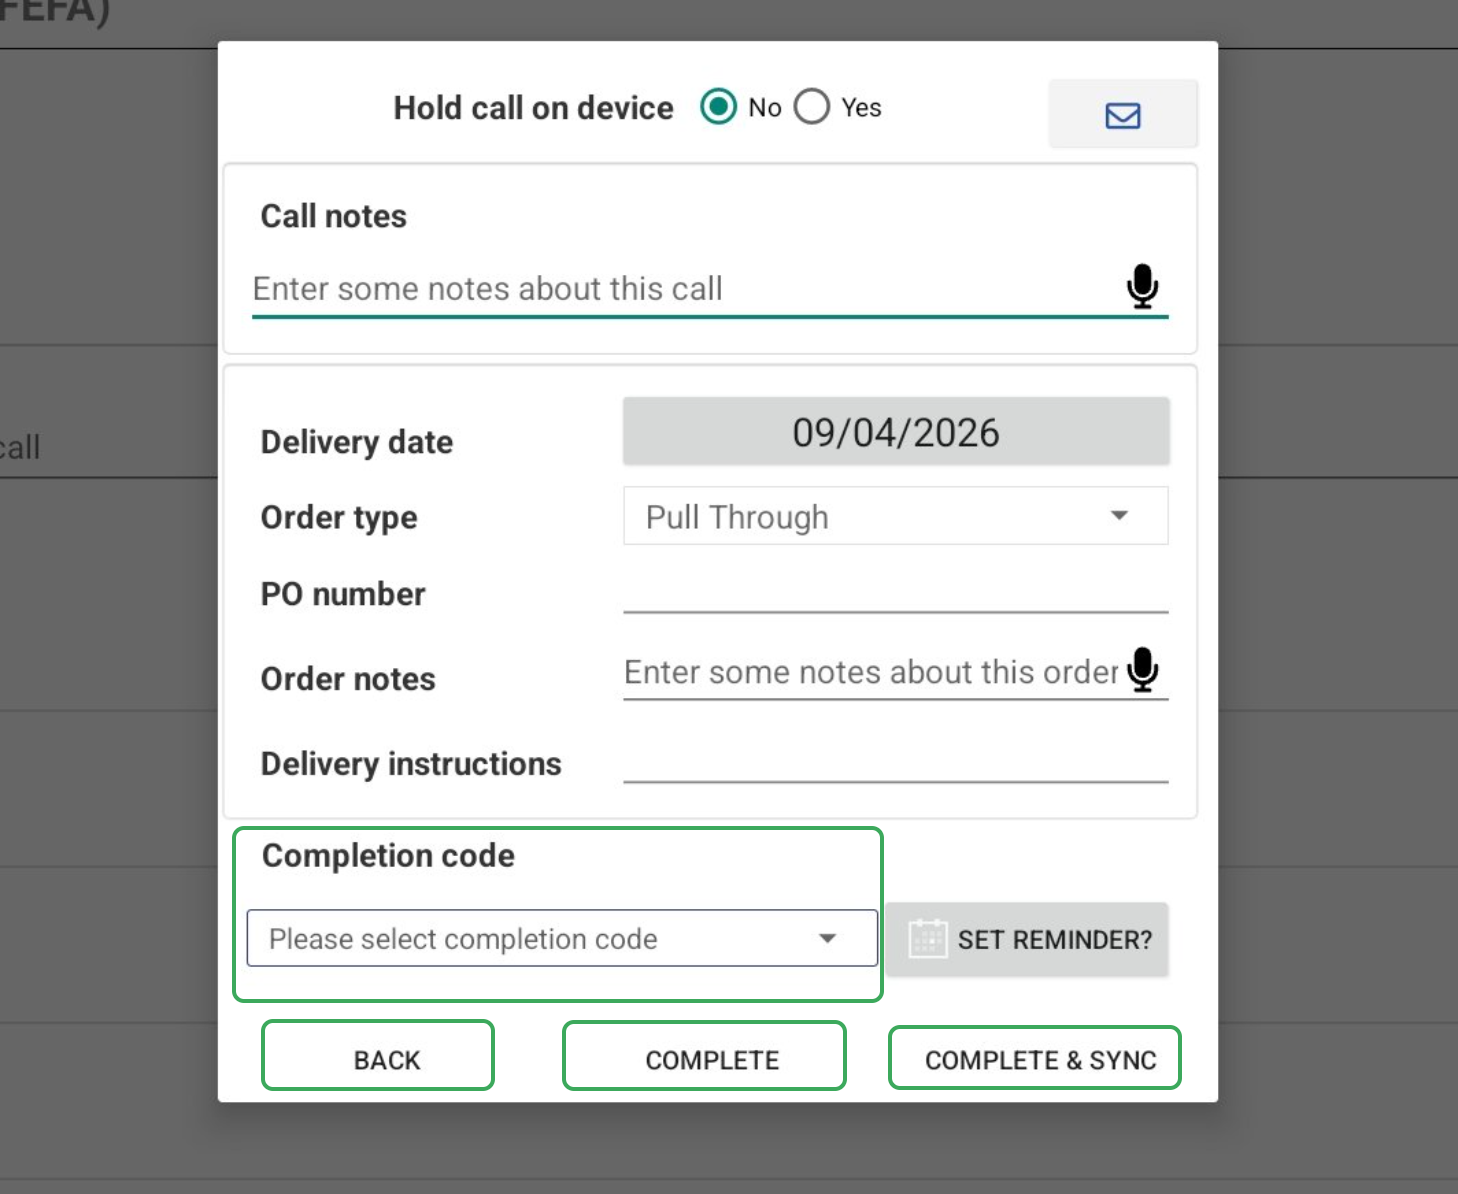
3
Enter call and order details
Complete the following fields as needed: Call notes, Delivery date, Order type, PO number, Order notes, and Delivery instructions. Use the microphone icon to dictate notes.
4
Select a Completion code
Choose the appropriate code from the Completion code dropdown.
5
Complete the call
Choose one of the following: Complete & Sync to complete and upload to the server immediately, or Complete to finish without syncing. Tap Back to return to the previous screen without completing.
✅ A synced call is marked with an S in the call history. An unsynced call shows a U and will remain on the device until a full sync is performed.
⚡
Reference
Quick Reference